Screen Recorder with Auto Zoom for Mac
Turn raw screen recordings into polished, focused videos. Creavit Studio automatically zooms into your clicks and cursor movements with smooth cinematic animations — no keyframing, no post-production.
How Auto Zoom Works
Every click triggers a smooth zoom. Every movement is tracked. Zero manual effort.
Cursor-Following Zoom
Auto zoom tracks your cursor in real time. When you click a button, open a menu, or navigate between panels, the viewport smoothly zooms into that area so viewers see every detail clearly.
Cinematic Easing & Motion Blur
Zoom transitions use spring-based easing curves with optional motion blur. The result looks like a professionally edited video — smooth, natural, and visually satisfying.
Click-Activated Zoom
Each mouse click triggers a zoom into the clicked area. This keeps the focus exactly where the action is, making tutorials and demos easy to follow even on small screens.
Adjustable Zoom Intensity
Control how deep the zoom goes — from subtle 1.5x emphasis to dramatic 4x close-ups. Match the zoom level to your content: light zoom for overviews, deep zoom for UI details.
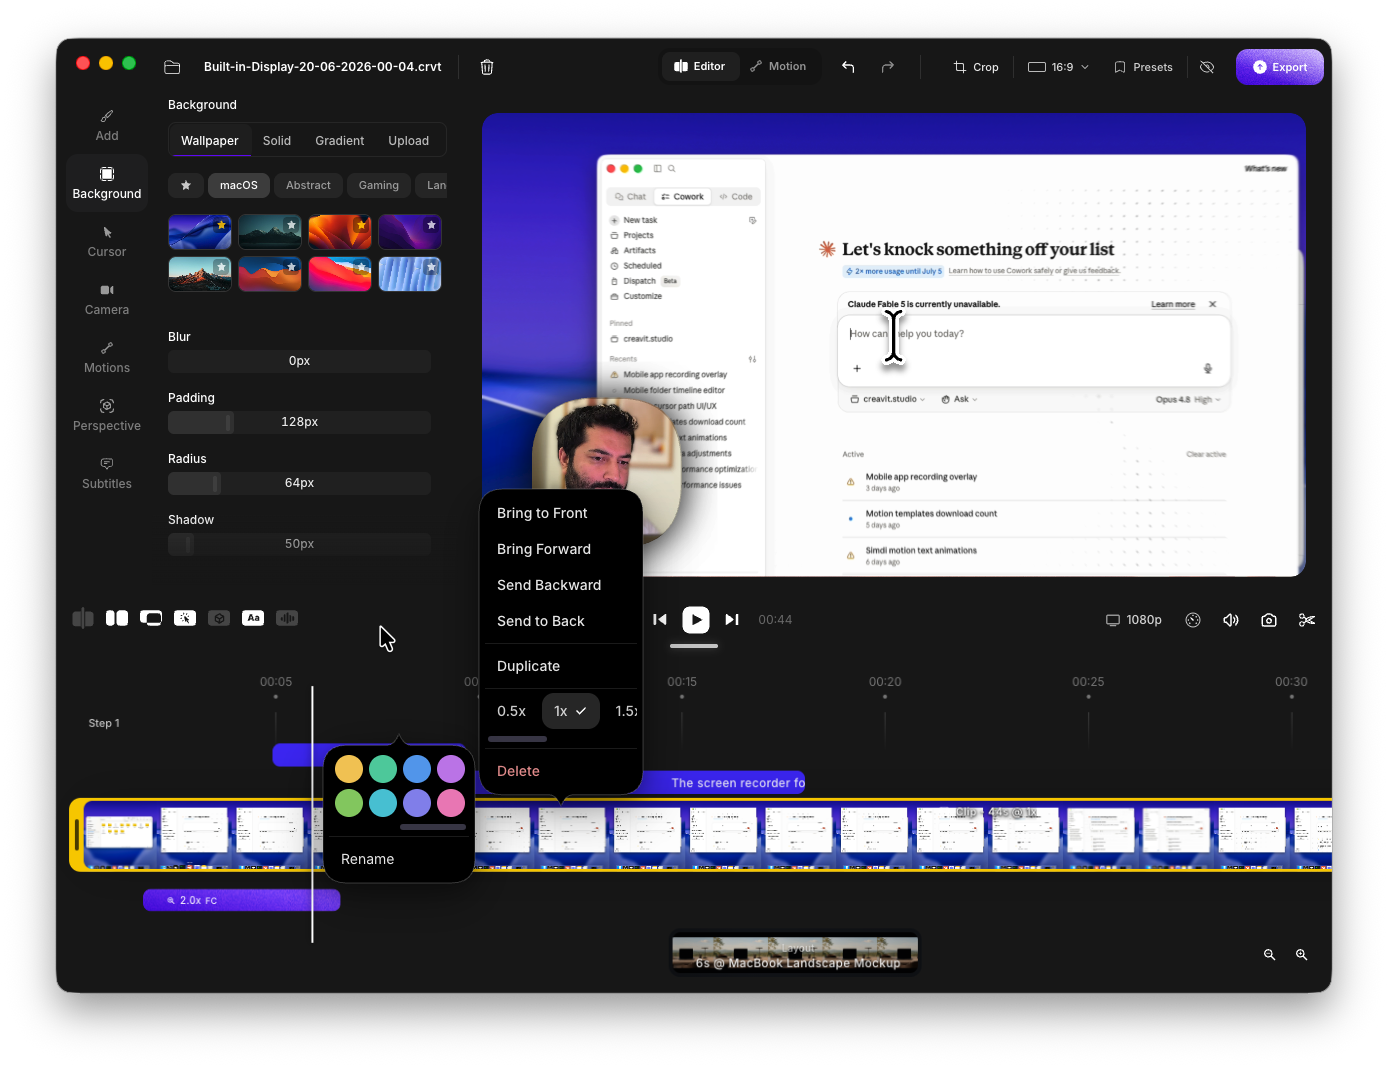
Post-Recording Zoom Control
Fine-tune zoom behavior after recording in the timeline editor. Add zoom to specific moments, remove unwanted zooms, or adjust timing and intensity at frame-level precision.
Smart Deadzone & Origin Tracking
The zoom viewport uses an intelligent deadzone system — small cursor movements within a region don't trigger unnecessary panning, while larger movements are followed smoothly.
Smoothly zoom the screen toward important UI so viewers follow the story—without jumpy cuts or a separate motion tool. Smart zoom keeps attention on what matters during capture and edit, so tutorials, demos, and launch videos read clearly on a single macOS timeline—no round-trip to another editor for pacing.
Make pointer movement and clicks easy to read on screen captures—ideal for product demos and engineering walkthroughs. Highlight the cursor for training and sales recordings; clearer click feedback means you spend less narration repeating where to look on the interface.
Remove the webcam background in the editor after capture for a clean talking-head cutout on macOS. Creavit Studio skips gimmicky real-time virtual backgrounds while you record. When you are done, strip the backdrop from the camera clip in-editor and ship a crisp subject silhouette in the final export.
Resize and position the webcam against the screen so the layout matches demos, tutorials, or talking-head moments. Switch layout presets and balance camera size with screen real estate—one coherent frame for onboarding clips, changelog videos, and creator content without leaving the recorder.
Add depth and editorial framing so flat UI captures feel closer to polished product marketing—not a raw screen grab. Perspective-style framing helps interface storytelling read intentional: viewers track hierarchy faster, which matters for SaaS launches, changelog videos, and investor-ready demos.
Drop titles, callouts, and code context next to the interface for tutorials, walkthroughs, and product explainers. Deliver context when viewers need it—not after they are lost. Layer readable emphasis for developer content so narration, cursor, and text reinforce the same beat.
Stack graphics, short clips, and supporting visuals wherever the edit needs them—without a separate compositing app. Bring reactions, logos, and motion layers into frame while keeping the screen readable. The result feels closer to branded product video than a flat capture.
Present the recording inside device frames and presentation-ready compositions for social posts and documentation. Wrap the timeline in a consistent mockup language for social and docs so every ship keeps the same professional line—from capture through export on macOS.
Design animated titles, shapes, images, and video clips on a dedicated motion canvas, then bring them into your screen recordings. Build polished animated sequences with layers, transform controls, timelines, and reusable motion templates—without leaving the Creavit Studio workflow.
Auto Zoom vs Manual Zoom Editing
Explore More
Pricing that fits you
Most screen recorders charge steep, per-device prices. One Creavit Studio license covers up to 5 devices and includes what others don't: a built-in Motion Studio, advanced timeline, full canvas control, and cinematic effects, with new features shipping constantly.
That's why lifetime access costs less than a year of most alternatives. And if you'd rather start small, the monthly plan still undercuts the rest. ❤️
DownloadCreavit Studio
Install the macOS build, start recording right away, and upgrade when you want full export access.
Frequently Asked Questions
Everything you need to know about auto zoom screen recording on Mac.
Creavit Studio tracks your cursor position and click events during recording. When you click a button or navigate to a new area, the viewport automatically zooms in with smooth, spring-based animations. The zoom follows your cursor movement in real time, creating a cinematic effect without any manual editing.
Yes. You can adjust the zoom intensity (how deep it zooms), the follow speed (how quickly it tracks your cursor), and the animation smoothness. These settings can be changed before or after recording.
Yes. Creavit Studio includes a timeline editor where you can fine-tune zoom behavior at frame-level precision. Add zoom to moments you missed, remove zoom from sections where it's not needed, or adjust the intensity and timing of existing zooms.
Manual zoom in editors like Final Cut Pro or Premiere requires placing keyframes, adjusting scale and position values, setting easing curves, and previewing repeatedly. This process takes 30-60+ minutes per video. Creavit Studio's auto zoom happens in real time during recording — zero extra work, professional results.
Yes. Auto zoom works with full screen recording, window recording, and custom area recording. It adapts to any screen resolution and recording size automatically.
Absolutely. Auto zoom works alongside all Creavit Studio features: webcam overlay with AI background removal, custom cursor styling, click highlight effects, GIF and image overlays, and system audio recording.
Yes. Auto zoom is especially valuable for content viewed on phones and tablets. By zooming into the active area of a desktop recording, small UI elements become clearly visible even on small screens — making your tutorials and demos mobile-friendly by default.
Auto zoom is ideal for software tutorials, SaaS product demos, coding walkthroughs, design tool demonstrations, bug reports, onboarding videos, and social media content. Any screen recording where viewers need to see UI details benefits from auto zoom.